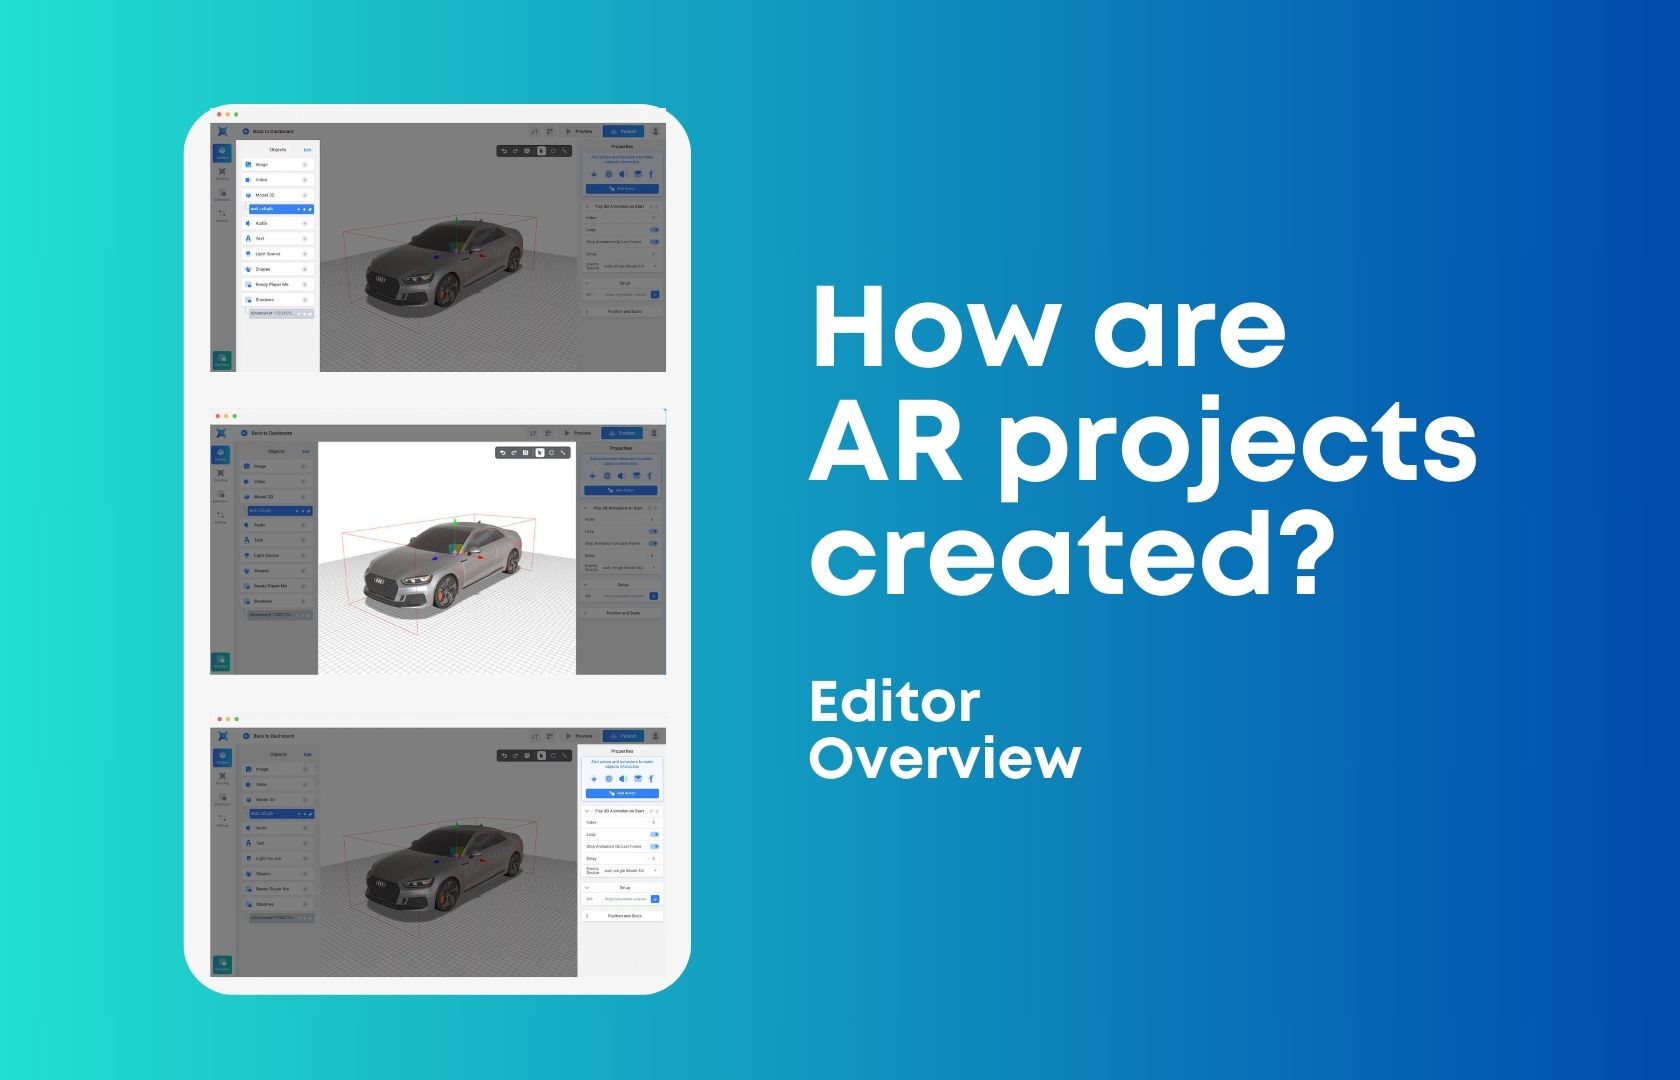
How to create augmented reality projects? If this is your first time on our website – be sure to read this article. In it, we want to introduce you to the MyWebAR editor. You should appreciate how convenient the editor is and how many features it can offer you.
MyWebAR editor allows you to design interactive augmented reality experiences in a user-friendly visual builder, without writing a single line of code.

The editor consists of six main parts:
1. Quick access panel
Quick access panel on the left that allows you to switch between Content, Branding, Extensions and Settings.
It also allows you to launch the PRO Editor that features more advanced capabilities, including the ability to use custom three.js code in your augmented reality experiences.The PRO Editor and custom code running capabilities are only available on the Ultimate plan.
The PRO Editor and custom code running capabilities are only available on the Ultimate plan.
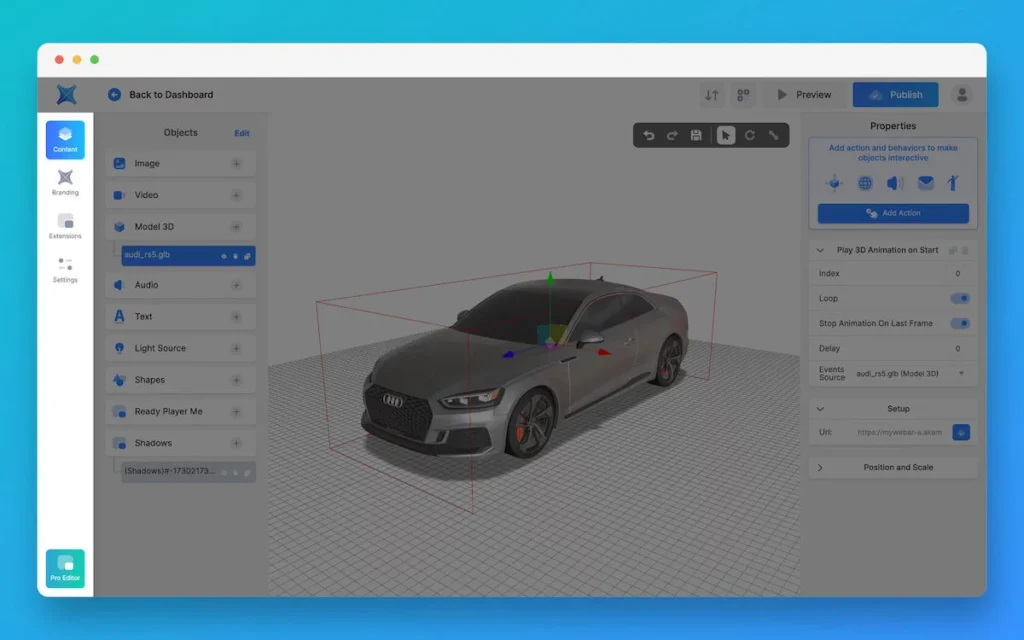
2. Content panel
Content panel that allows you to add different types of content to your augmented reality experience, including images, videos, audios, 3D models, simple shapes, text, light sources and more. How to create augmented reality projects? You’ll see – it’s very simple!
You can see the content currently added to the scene as layers with options to hide, remove or duplicate them.
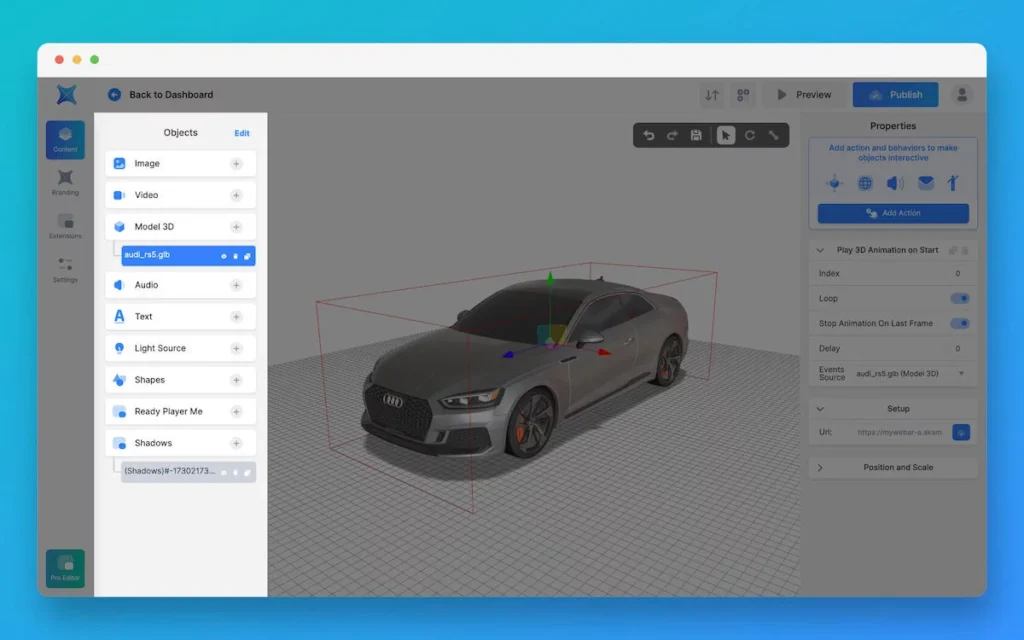
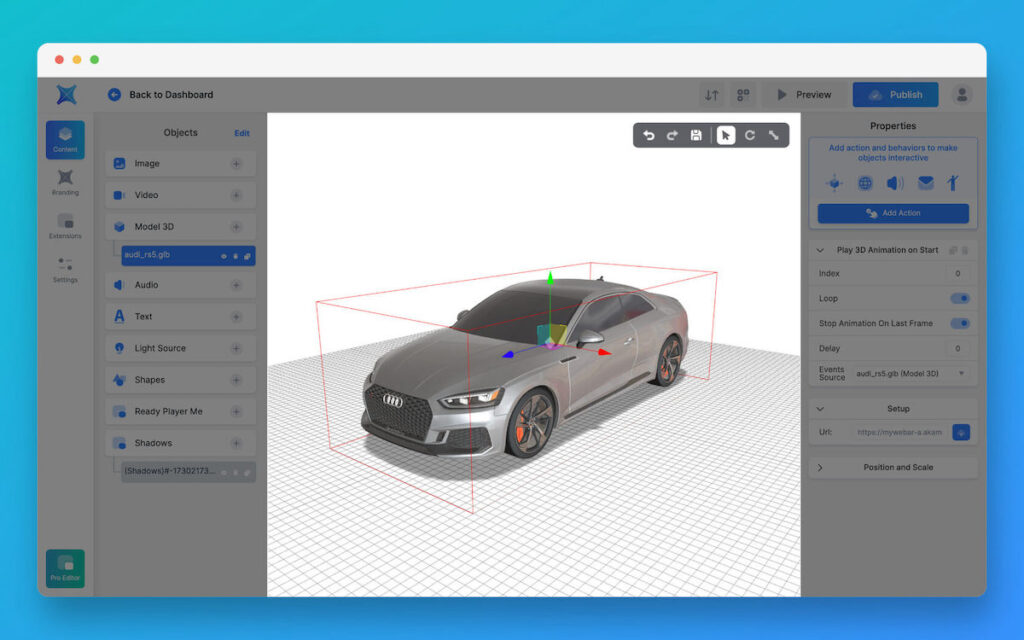
3. 3D workspace
3D workspace where you can see the content you currently have on the scene and adjust its appearance and position.
It also includes an overlay that allows you to undo and redo recent changes, save your AR experience without publishing it and switch between the tools to move, rotate or scale your object using your mouse in the 3D workspace.
4. Properties panel
Properties panel on the right that allows you to add interactive actions and behaviors to objects on the scene, change their settings and properties and finetune the position, rotation and scale.

5. Top navigation bar
Top navigation bar where you can import and export your project, quickly access the QR code of your AR experience, preview the scene without running it on a mobile device and publish the changes you’ve made to your experience to make them available to users.

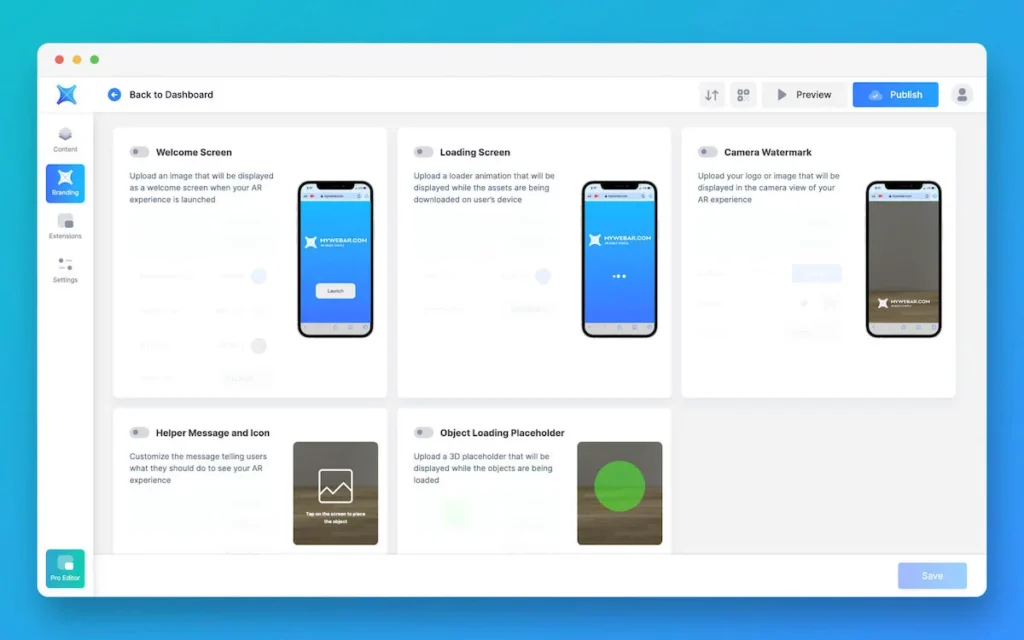
The Quick Access panel also includes the Branding, Extensions and Settings tab.
Switching to the Branding tab on the left panel allows you to customize the splash screen, loading animation, camera watermark, helper icon and message of your augmented reality experience.
Please note that customization features are only available on the Ultimate plan.
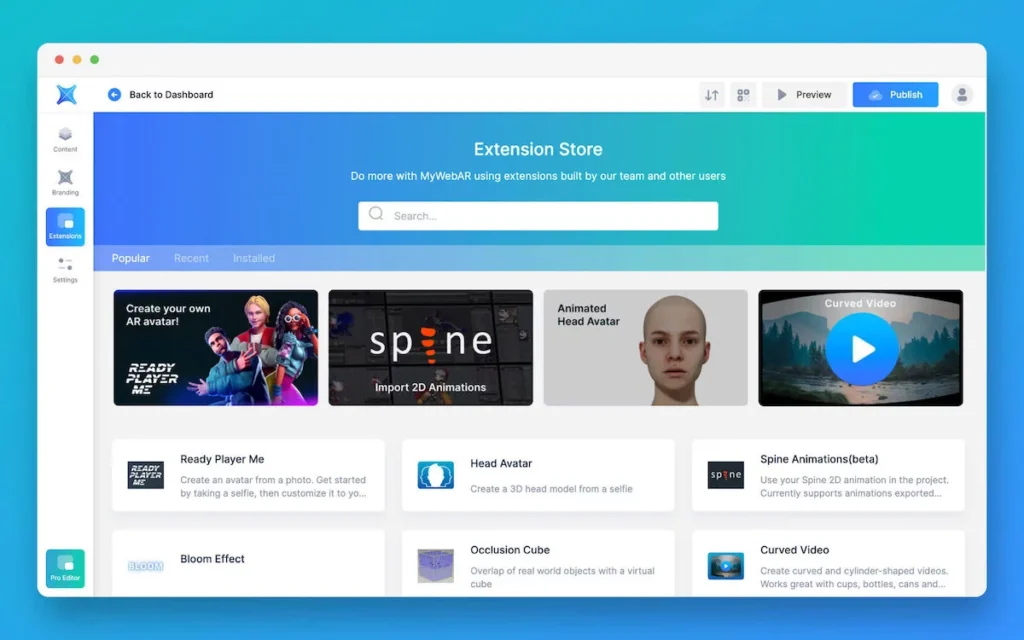
On the Extensions tab you can access the extension store where you can add new features by installing plugins.
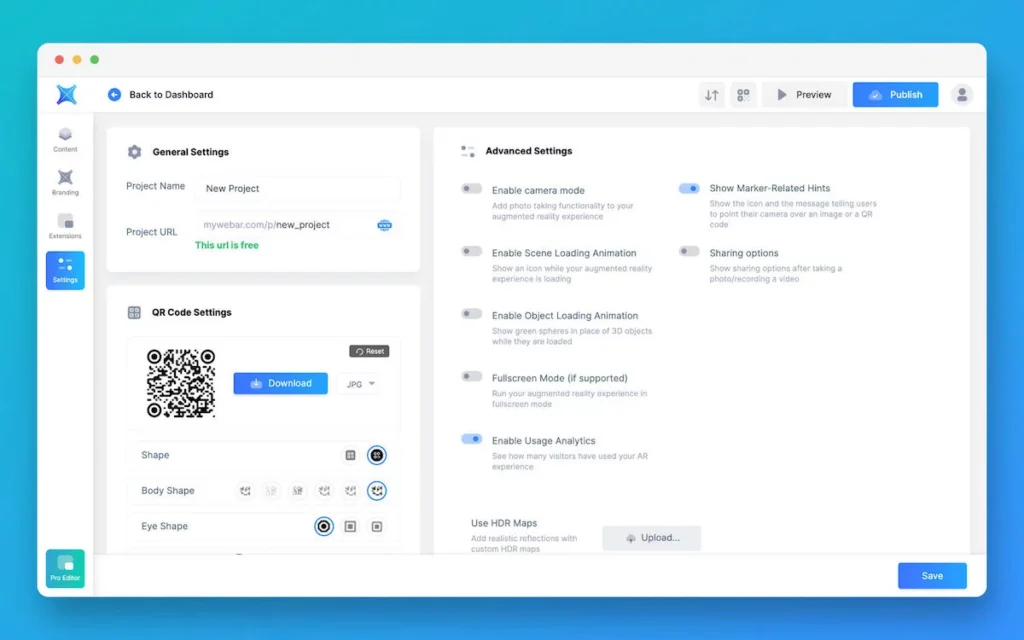
On the Settings tab you can change the name and URL of your experience, customize its QR code and enable different, fill in the attributes of your webpage and manage advanced settings.
As you can see – it’s very simple. Try to create your first augmented reality project today! For example, like this one.